

Straight-line stringer tutorials for your pleasure!
(Donations appreciated)
(Jessica Herrell or jc@jcherrell.com)

![]()


![]()


,
![]()

The tapered end Finding the zone & starting the line Drawing a straight line Completing/cutting the line
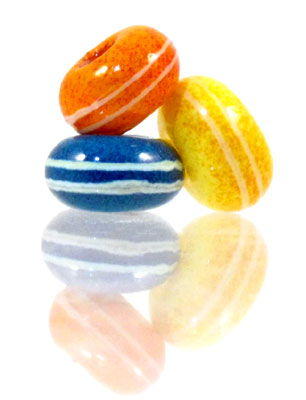
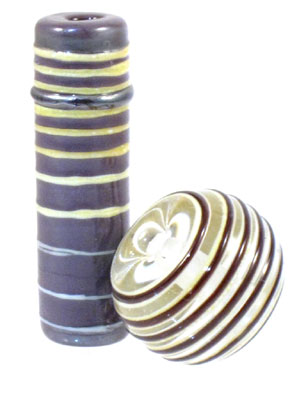
If you were to pick one stringer skill to learn, one line of stringer to know better than any other line, I hope you would pick this line. First, in my view, this is the hardest of all lines to master. Learn this one line first and all the others will be easier. Second, this line will add to your designs in innumerable ways. A ring around a bead can be used to frame and border, straighten uneven seams, hide errors, create contours, and add function like wire wrap-ablity. Simple rings can make dramatic designs on their own and are easily manipulated to create another whole big universe of design and effect possibilities. Simply stated: KNOWING THIS LINE IS MONEY!
This video is an overview of the entire process described in this tutorial. It starts with a wide view, followed by a close up, and ending with an enhanced version of the close-up where the details are a bit easier to see.
The tapered end
Tapered ends on your stringer are, to say the least, extremely helpful in creating an even seam in a ring of stringer. However, it is possible to start with a blunt end and pull a taper directly on the bead as you begin to draw your line.
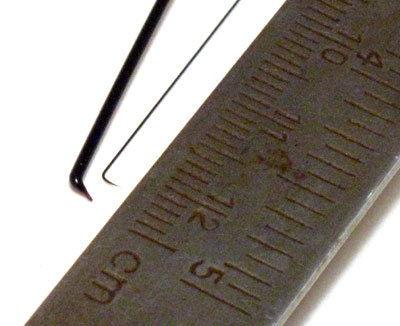
Select your stringer! Choose as thick or thin of a stringer as you are comfortable. The stringers displayed here have tapered ends and bends from being flame cut on a previous bead. If your stringer does not already have a tapered end, create one using one of the two following methods:
Method 1: The mandrel swipe. This video shows a quick heating and swiping of the end of the stinger. This method is quick and efficient. However, the drawbacks to this method include a bent end (if you find them undesirable) and, on occasionally, broken bead release.
Method 2a-c: Pull a tiny point. There are three variations to this method below. The advantage to all variations on this method is that your taper will not be bent, thus a bit easier to start on the bead. However, all of these methods require two hands (thus forethought and preparation).
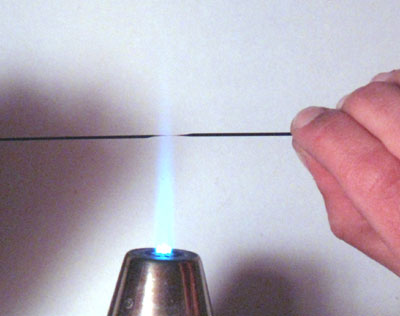
Method 2a: Pull the end of the stringer. Grab the stringer at both ends and flame cut a taper with a small neutral flame as close to one hand as you are comfortable.
Method 2b: Pull off the end of the stringer with a tool. Heat the end of the stringer until a small ball forms. Grab the ball with a tweezers or pliers (or whatever tool you like) and pull it off leaving a taper on the end of the stringer.
Method 2c: Pull the point with a rod. Preheat the rounded or tapered end of a rod in the back of the flame, be sure the glass does not become soft. Heat the end of the stringer to form a small ball. Touch the end of the rod to the ball at the end of the stringer and immediately begin to pull creating a taper on the end of the stringer.
Finding the zone & starting the line
First, an enhanced video showing the process of laying this line. Note the slow approach to the flame when starting the line and the quick flick cutting the stringer at the end of the line.
Preheat the bead where you intend to place the stringer. The thinner the stringer you are working with, the more important this step becomes. If the bead is too cool when first applying the stringer, the end will tend to ball up causing a lump in your line. If the bead is too cool when applying the rest of the stringer, it will tend to skip along or rise up from the surface causing an uneven or interrupted line.
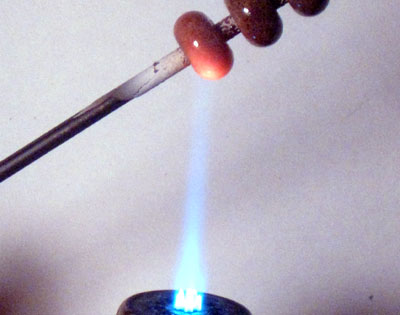
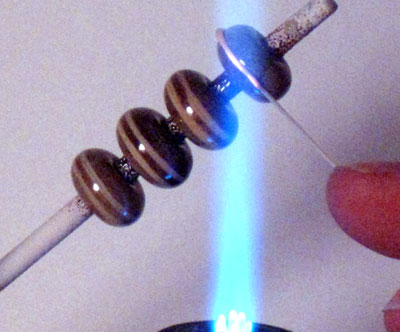
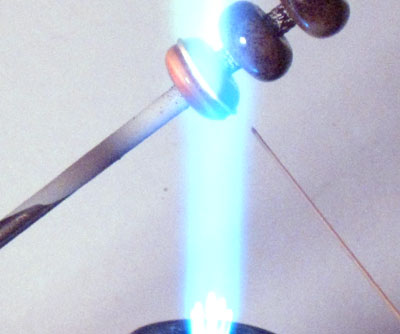
If the end of your stringer is bent, rotate the stringer so that the taper points down towards the bead. Lower the tip of the stringer to the surface of the bead and slowly approach the flame applying very gentle pressure in the direction of the line you are about to draw. Applying too much pressure here will rake the surface of your bead.
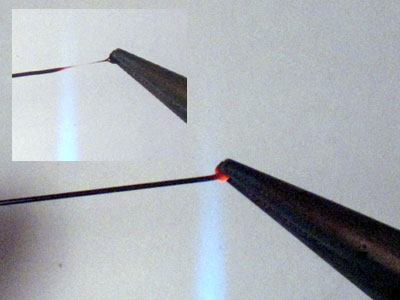
As you approach the flame you will feel the tip of the stringer "give" as it softens in the invisible heat of the flame. This is the zone that will allow the most control over the stringer. Notice that the flame is to the left of the stringer yet the tip of the stringer is glowing red. As this tip rotates up and into the flame it will begin to fuse into the bead forming a ramp to cut the stringer on when finishing the line.
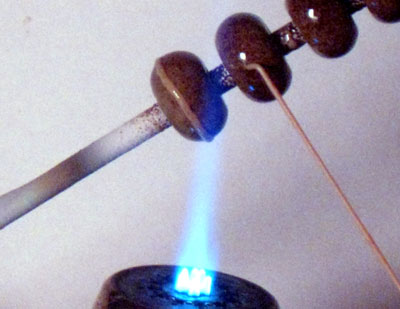
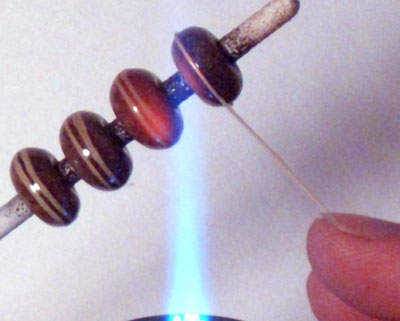
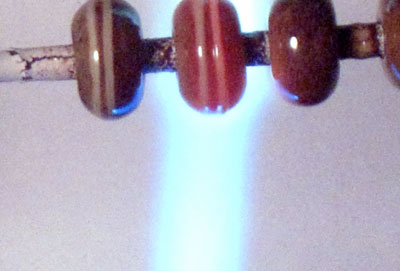
Keep your line straight! I find that "feeding" the stringer into the line produces a more consistent result than "drawing" a line: Rotate the bead away from you and allow it to pull the stringer through your fingers. In the picture above, notice the stringer being laid is to the right of the flame while the bead is mostly below the flame. Using the zone under the flame to soften the stringer allows the rotate up and into the flame, fusing it to the bead at the same time it is being drawn. (Note: If the line is not straight you can either rotate the stringer in the direction needed to connect the line or remove the stringer and try again.)
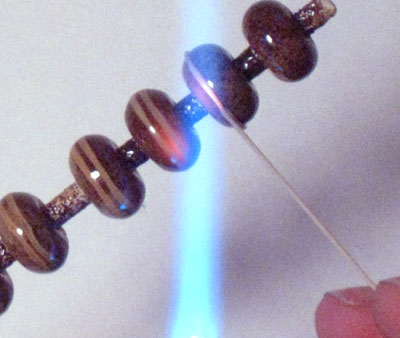
Be careful not to get too hot! Too much heat will cause the line to become uneven or skip.

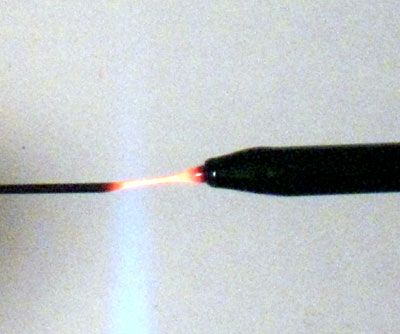
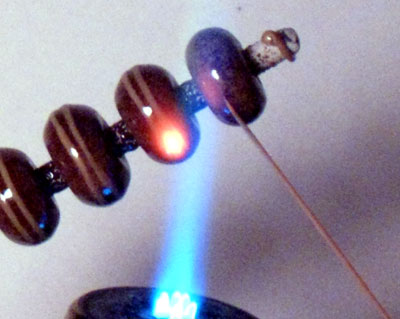
In this picture the bead was in the correct position in relationship to the flame, but the bead was too cool which caused the stringer to lift from the bead. To prevent this situation, heat the bead more before applying the stringer. To repair this situation, either keep drawing the line while moving the bead into a slightly warmer area which will cause the line to fall back onto the bead, or...
... immediately stop and remove the stringer. In this video something goes wrong with the line so I stop, remove the bead from the flame, and knock the stringer off with a knife.
Cutting the stringer/completing the line
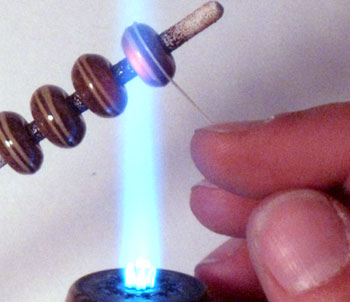
As bead rotates and the start of the line comes into view, begin to tighten your grip on the stringer in preparation to terminate the line.
Begin to move just slightly closer to the flame so that the stringer will be soft and ready to drag quickly along the bead.
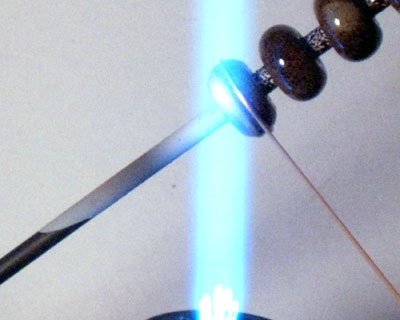

As the stringer begins to overlap the taper that started the line, move quickly into the flame as you add downward pressure to the stringer. The ideal result will be a flick that leaves a second taper directly on top of and opposing the first taper and the remaining flame-cut from the bead.
The stringer seam will now be in the flame. The longer seam remains in the flame immediately after cutting the stringer from the bead, the more likely it is that the glass will begin to gather and the line will become uneven. Instead, allow the bead to continue to rotate through and past the flame after cutting the stringer from the bead.
To fuse the line evenly, introduce the heat as gently and evenly as possible allowing the glass to spread and even out. Avoid heating the stringer too quickly - this will result in gathering glass and an uneven line. Instead, rotate the bead quickly to spread the heat more evenly around the bead.
Did you find this information helpful? Will it enhance your work? Any donation is appreciated!
Questions or comments? Let me know so I can make these tutorials even more user friendly!
The Joy of Stringer Menu www.jcherrell.com Purchase work
Written and
photographed by JC Herrell; Copywright, JC Herrell 2010
Free lampwork glass bead straight line fine string control tutorial.